

If you want to use a new type of hanger, or are a fab shop that gets a job from a contractor that uses a hanger type that you do not have, it is easy to add that new hanger type to your own machine.
A hanger is an assembly, and an assembly is just a collection of individual pieces and parts.
There are two ways to edit an Assembly, a temporary edit and a permanent edit.
The temporary edit is specific to the project. In the project, go to the Hangers tab and pick the code next to the hanger in question.
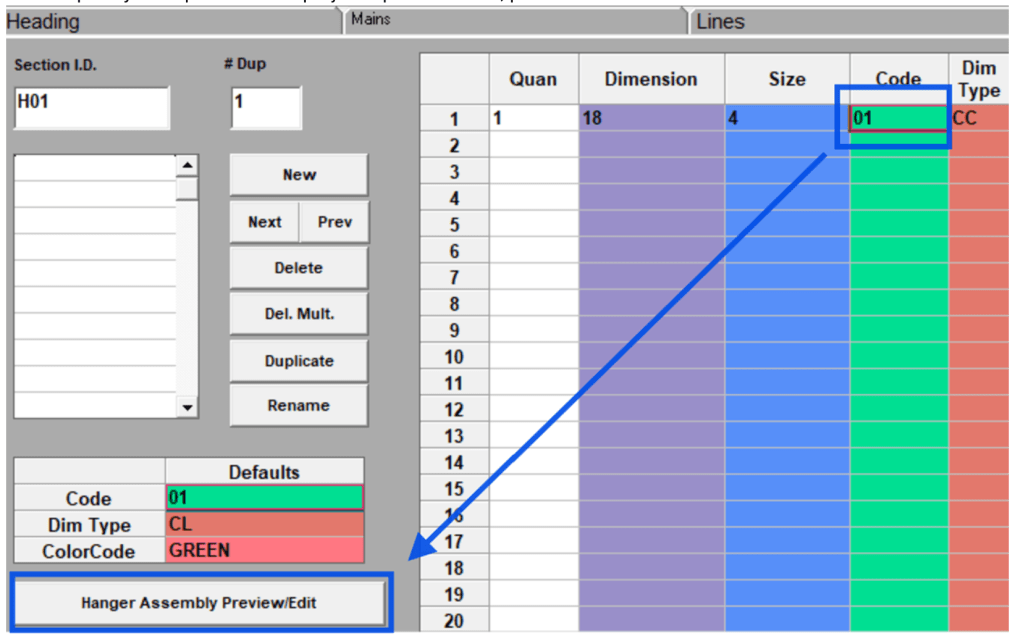
Then, pick the Hanger Assembly Preview/Edit button
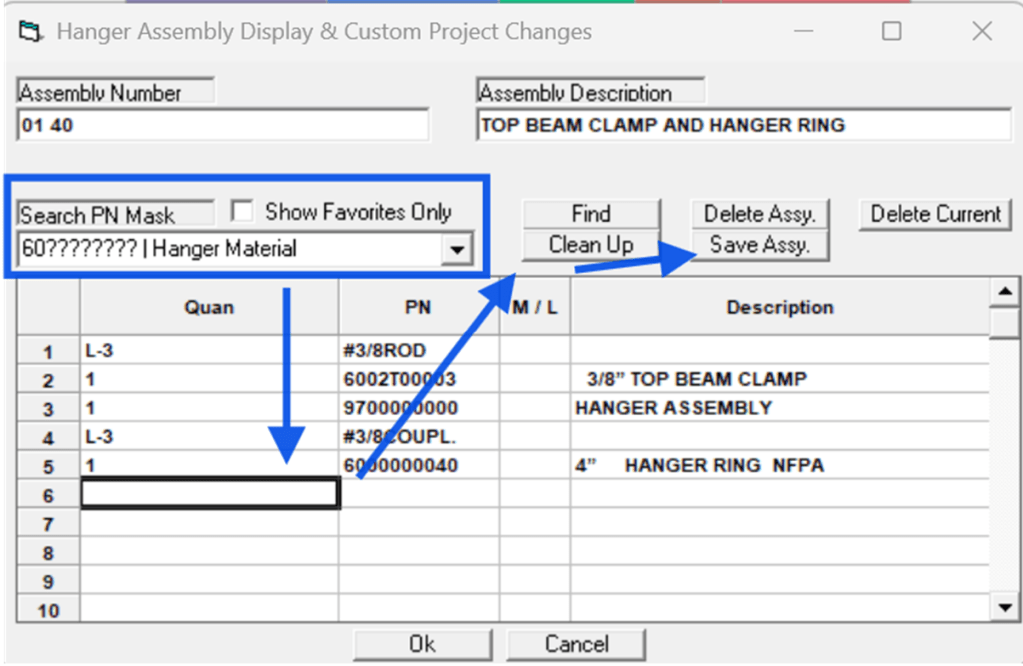
Search for the part(s) you wish to add, give it a quantity. pick Clean Up, Save the assembly. That hanger assembly will be altered for that project only and will turn to a gentle peach color.
The permanent way is to go into HydraLIST and edit the database

Pick the Assembly Table tab and select the hanger type to work on. Modify it as needed, add parts, or create a whole new one. Save the assembly when done.

The HydraLIST manual has complete instructions beginning on page 7-239
 The H-Factor
Leave a comment